Introduction
Welcome to my first home lab project! This has been one of my favorite builds because it's something I still use today. It started as a way to learn more about network storage, but it quickly became a reliable part of my home network. I hope you enjoy reading about the build process as much as I enjoyed putting it together.
Project description
A home storage server, also known as a NAS (Network Attached Storage), is a dedicated computer connected to your home network that stores digital files, backups and media. Think of it as your own private cloud that you control.
Hardware and software used
Software
- TrueNAS Community Edition (CE)
Hardware
- HP ProDesk 600 G3
- Intel Celeron G3930T
- 16 GB DDR4 SODIMM RAM
- CENMATE 2-Bay HDD Enclosure
- 2 × Western Digital Ultrastar DC HA210 (2 TB SATA HDD)
- Custom 3D-printed 10-inch rack
Cost breakdown
- HP ProDesk 600 G3 — free (would run roughly $100–150 used)
- CENMATE 2-Bay HDD Enclosure — $60
- 2 × Western Digital Ultrastar DC HA210 (2 TB) — $100 total
- Filament and parts for the 3D-printed rack — ~$15
Total out of pocket: ~$175
Prices reflect what I paid before the recent RAM/storage price spike — expect to pay more for drives at today's prices.
Purpose
The goal of this project was to build an inexpensive and reliable storage server for my home network. I wanted a place to store important files, backups and shared folders while also gaining hands-on experience with TrueNAS and ZFS. I also wanted a system that I could expand and improve over time.
Build process
Step 1: Purchasing the hardware
The first step was gathering all of the hardware. I chose the CENMATE two-bay DAS enclosure because it was simple to set up and supported USB 3.0 speeds. While USB isn't the fastest option for a NAS, it fit my budget and has worked well for my needs.
For storage, I searched ServerPartDeals for enterprise hard drives and found a pair of Western Digital Ultrastar drives that offered a good balance of reliability, performance and price.
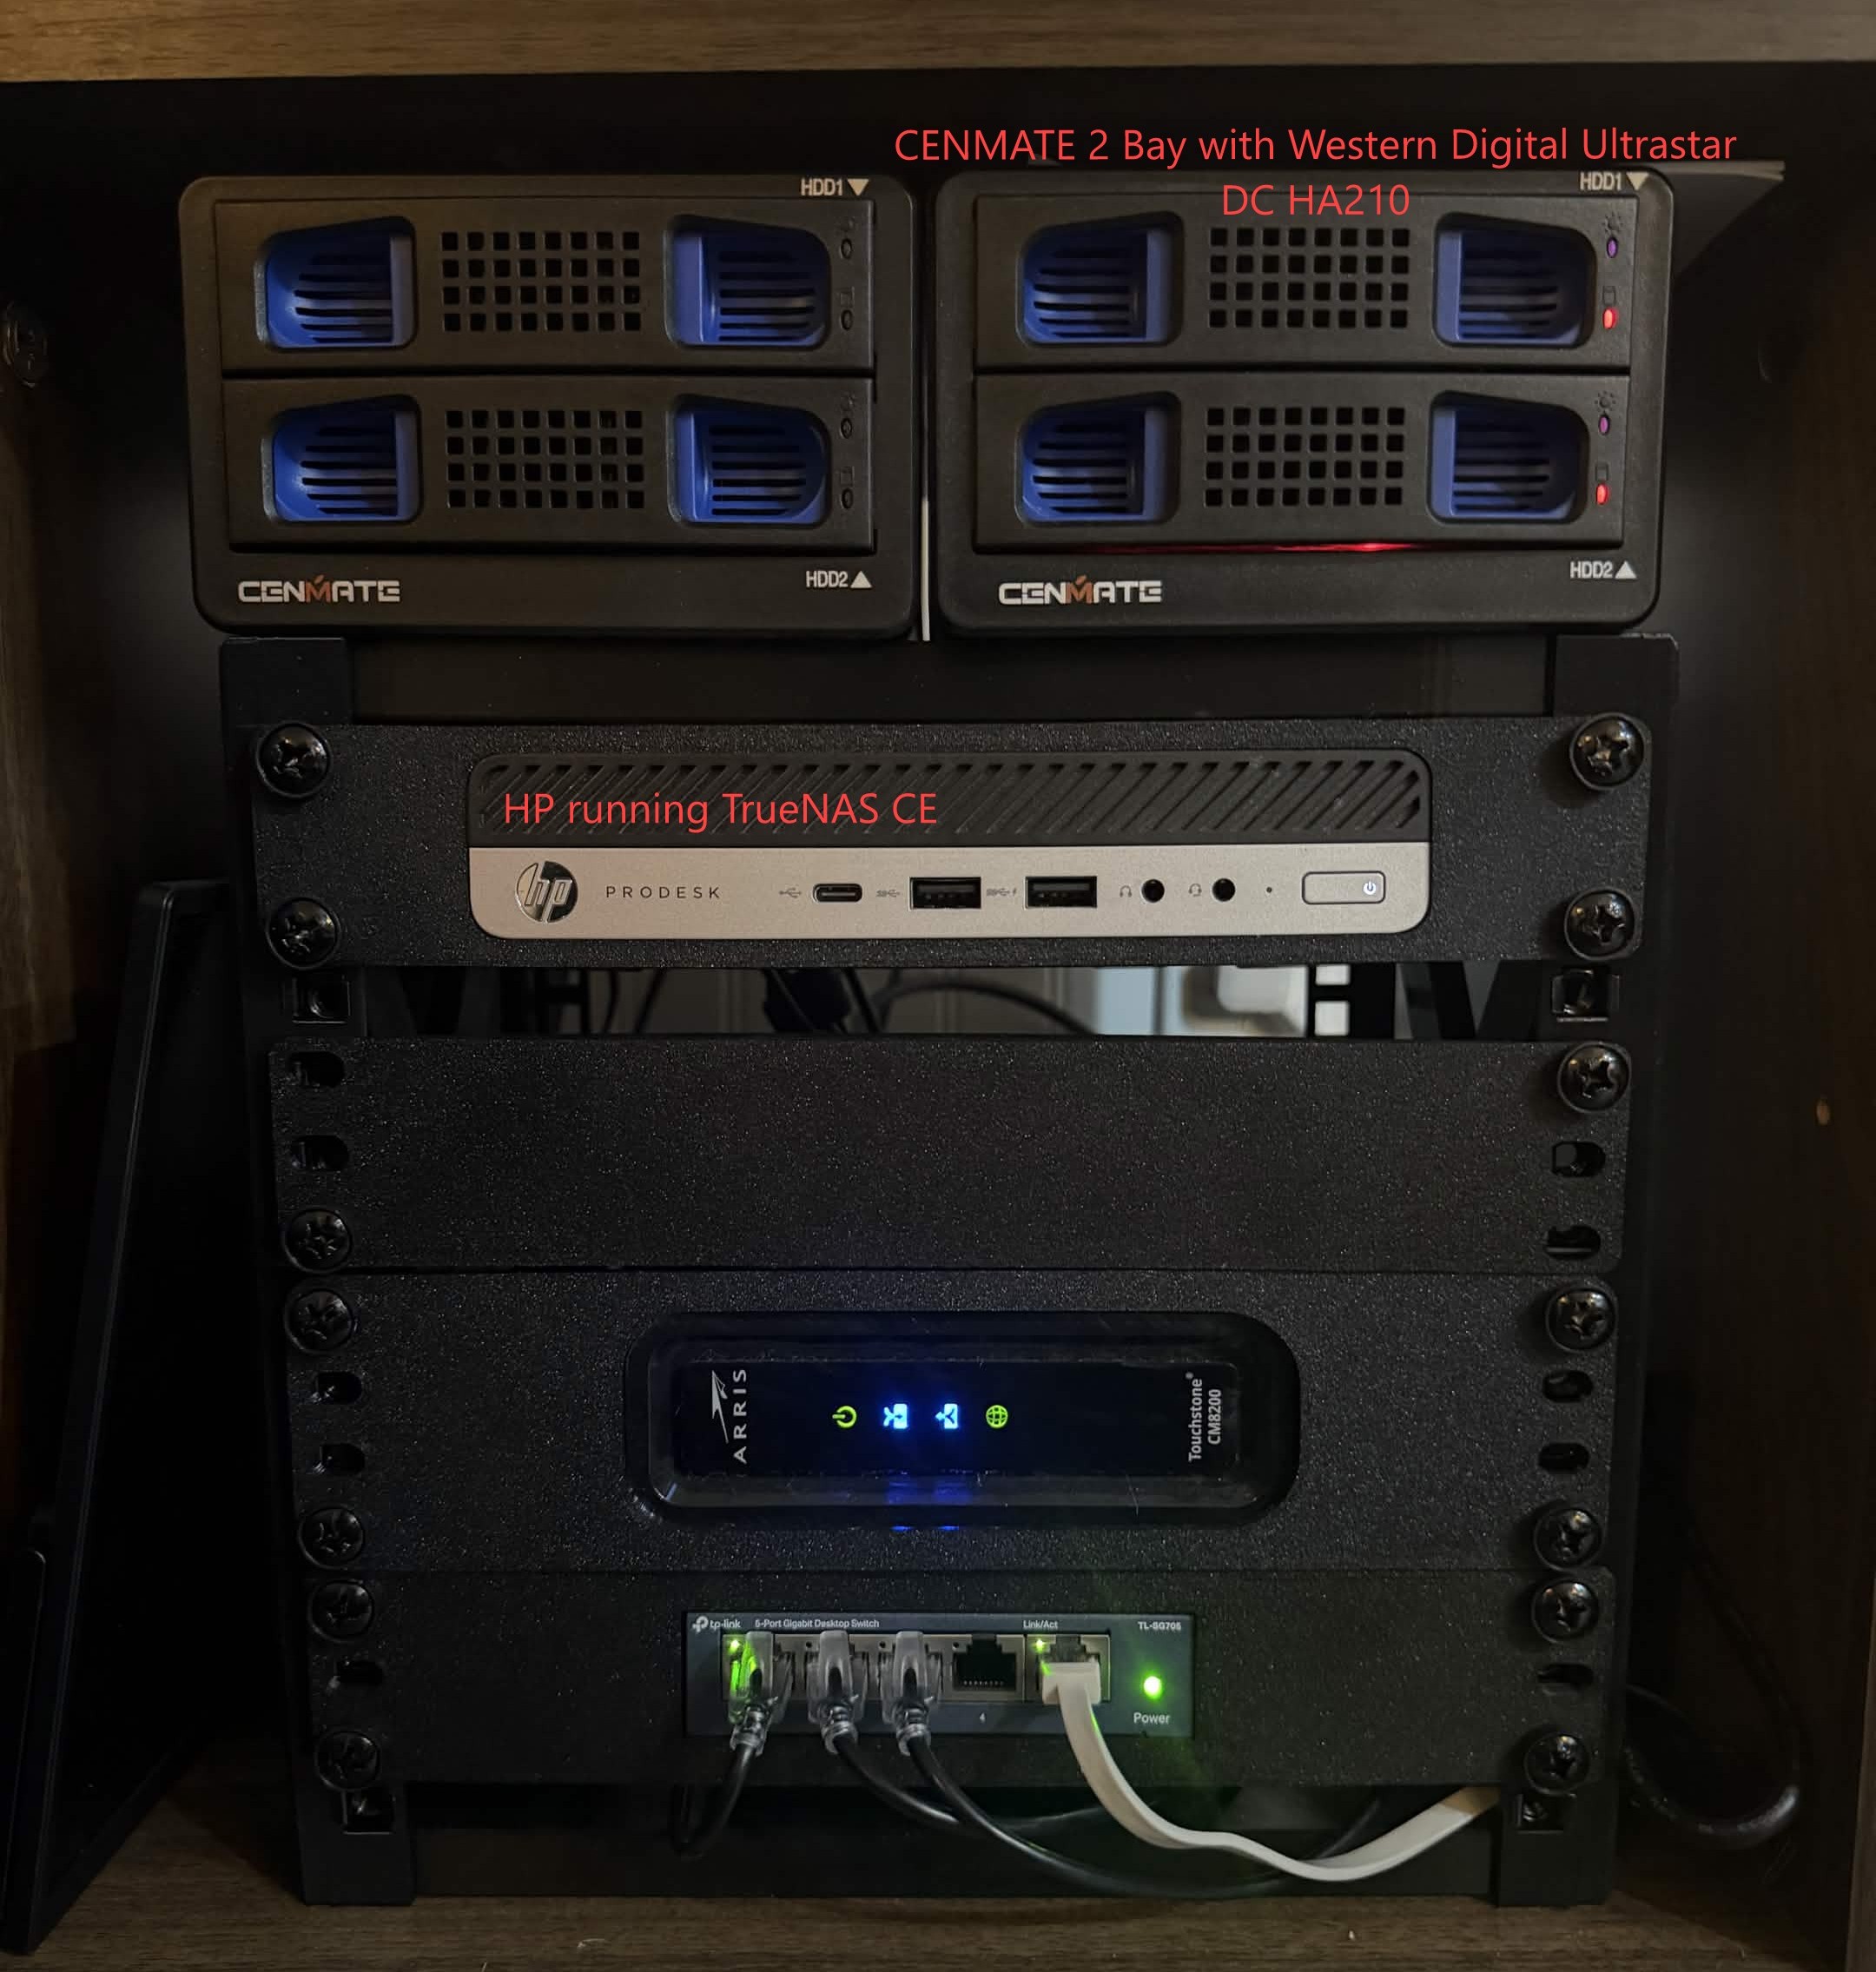
Figure 1. Completed HP ProDesk 600 G3 NAS mounted in my custom 10-inch rack.
Step 2: Teardown and inspection
Since these HP ProDesk 600 G3 systems were purchased used, I wasn't sure what condition they were in. After removing the top cover, I inspected the system for any obvious damage. Everything looked clean, so I removed the CPU cooler and checked the processor.
The thermal paste had completely dried out, so I cleaned both the CPU and heatsink with isopropyl alcohol before applying fresh thermal paste. While everything was apart, I also cleaned dust from the heatsink and cooling fan.
After reassembling the system, I powered it on. The internal drive had already been wiped, so the BIOS simply prompted me to install an operating system.
Step 3: Choosing an operating system
I decided to use TrueNAS Community Edition (CE) for this project. I had previously experimented with OpenMediaVault and enjoyed using it, but I wanted something with more enterprise features. TrueNAS offered everything I was looking for, including native ZFS support, snapshots and a polished web interface, all at no cost.
Step 4: Installing TrueNAS
I downloaded the latest TrueNAS CE ISO and copied it to my Ventoy bootable USB drive. After booting the HP ProDesk 600 G3 from the USB drive through the BIOS, the installation process was quick and straightforward. Once installation finished, the system restarted successfully and displayed the IP address for accessing the TrueNAS web interface. From there, the rest of the configuration was completed through the browser.
Step 5: Initial configuration
Once inside the TrueNAS web interface, I configured the storage pool using the two Ultrastar drives and created the datasets that would store my files.
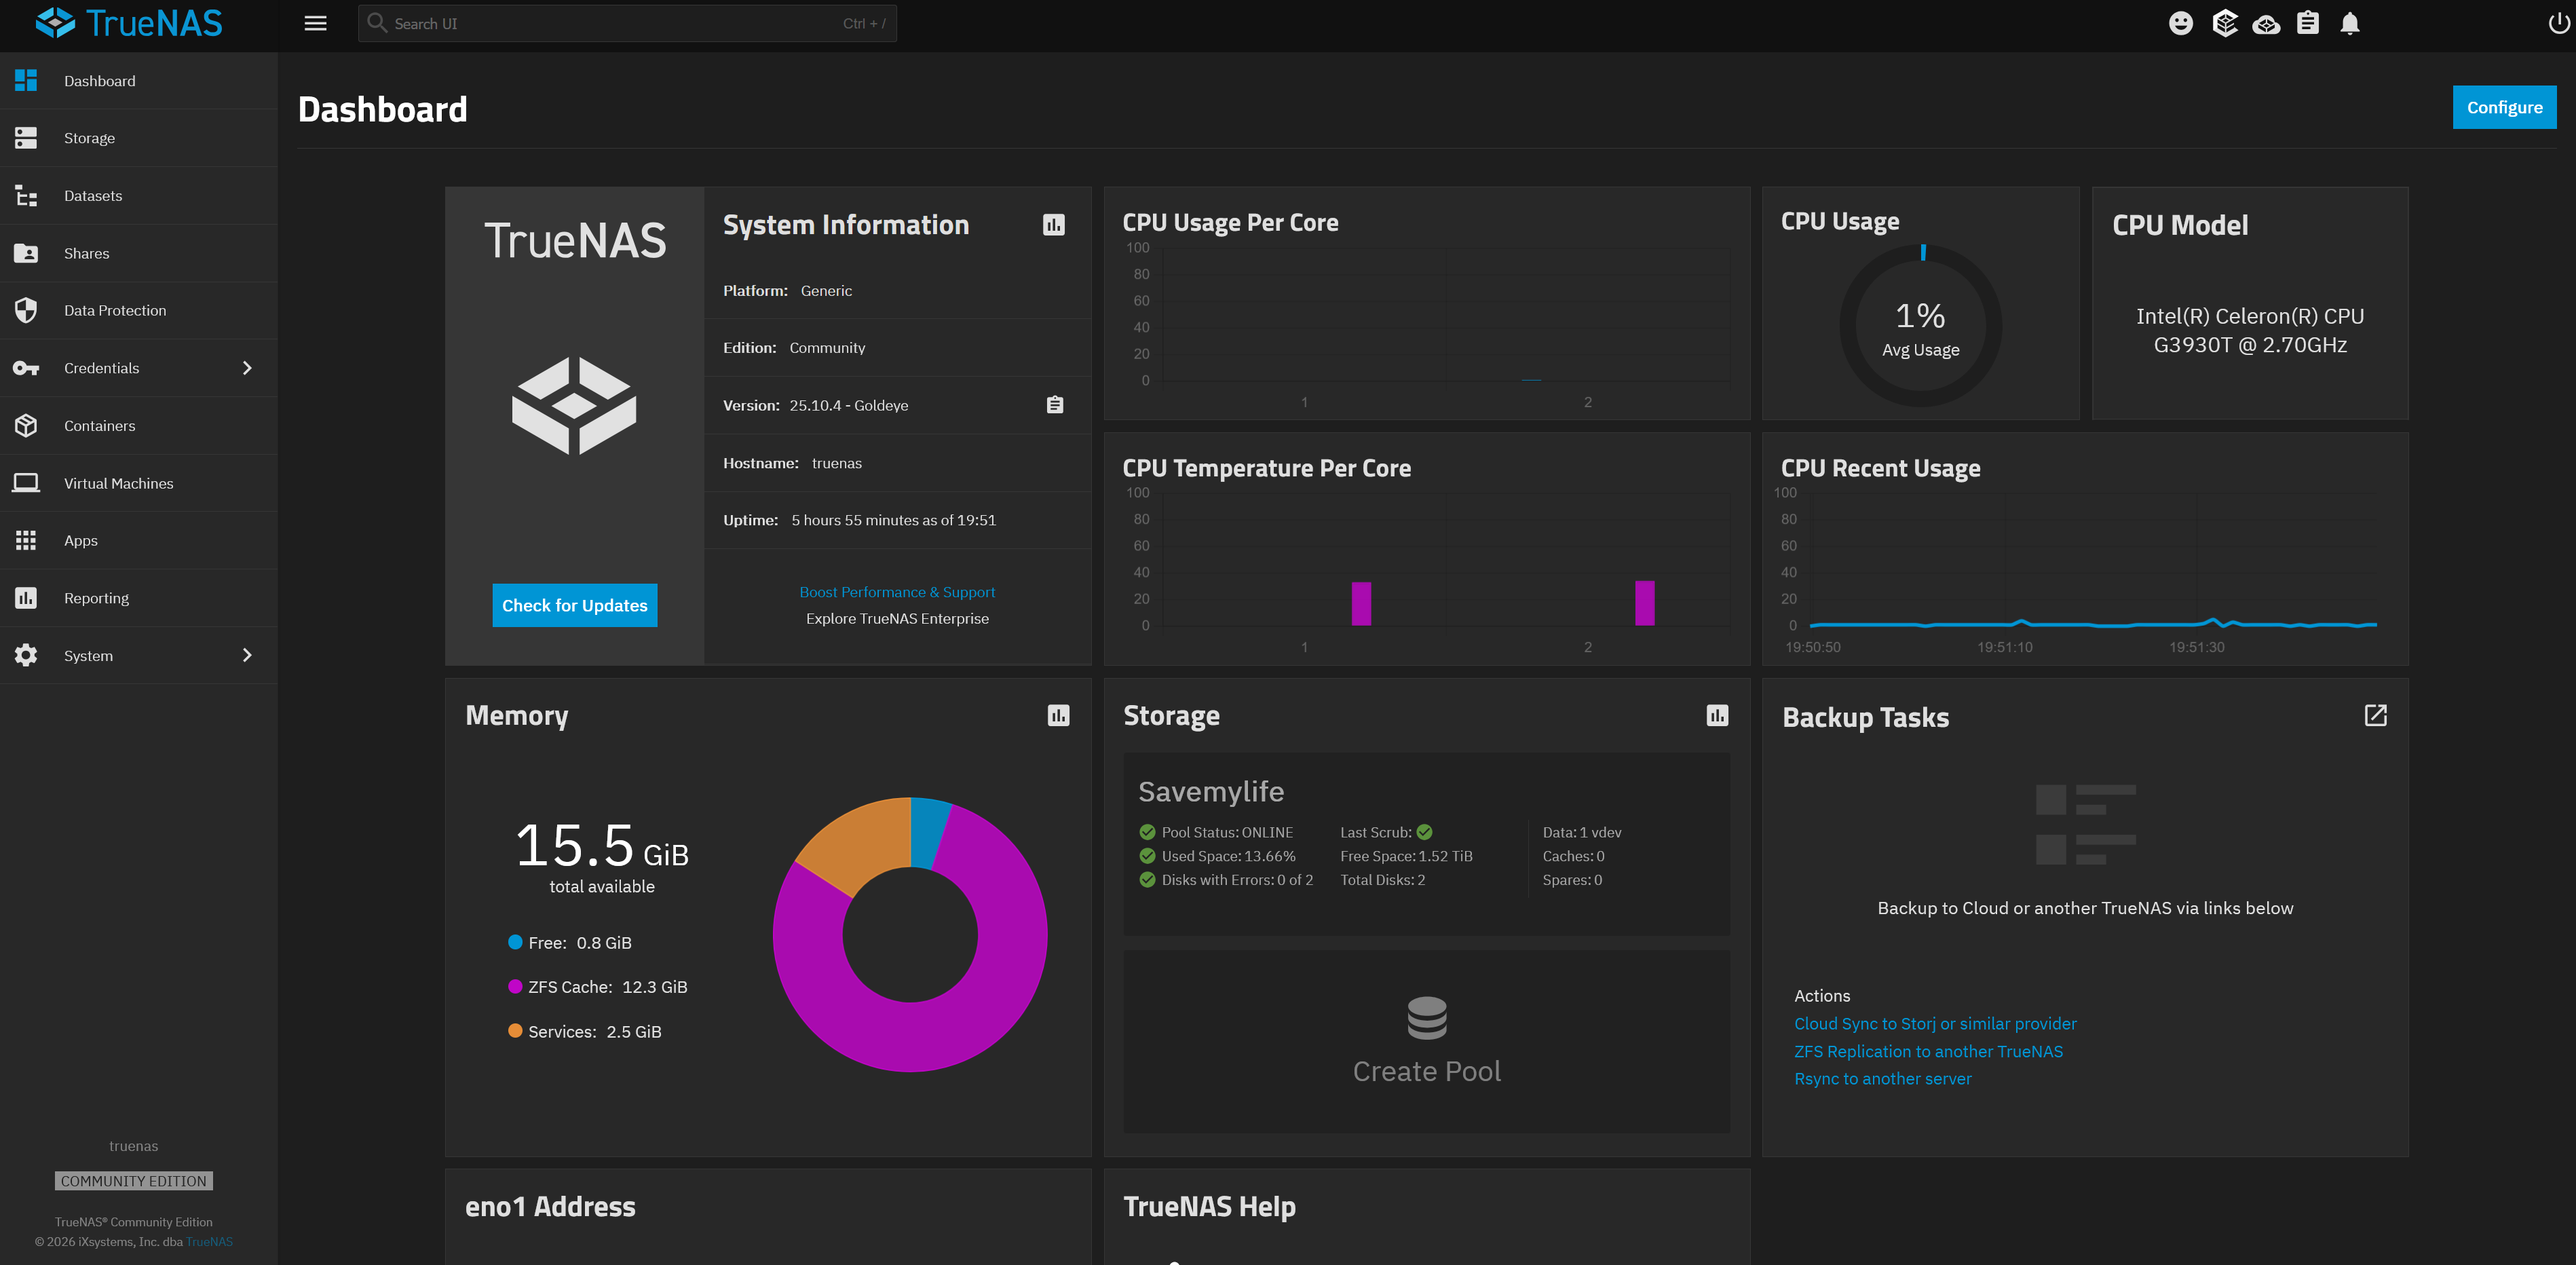
Figure 2. TrueNAS dashboard setup.
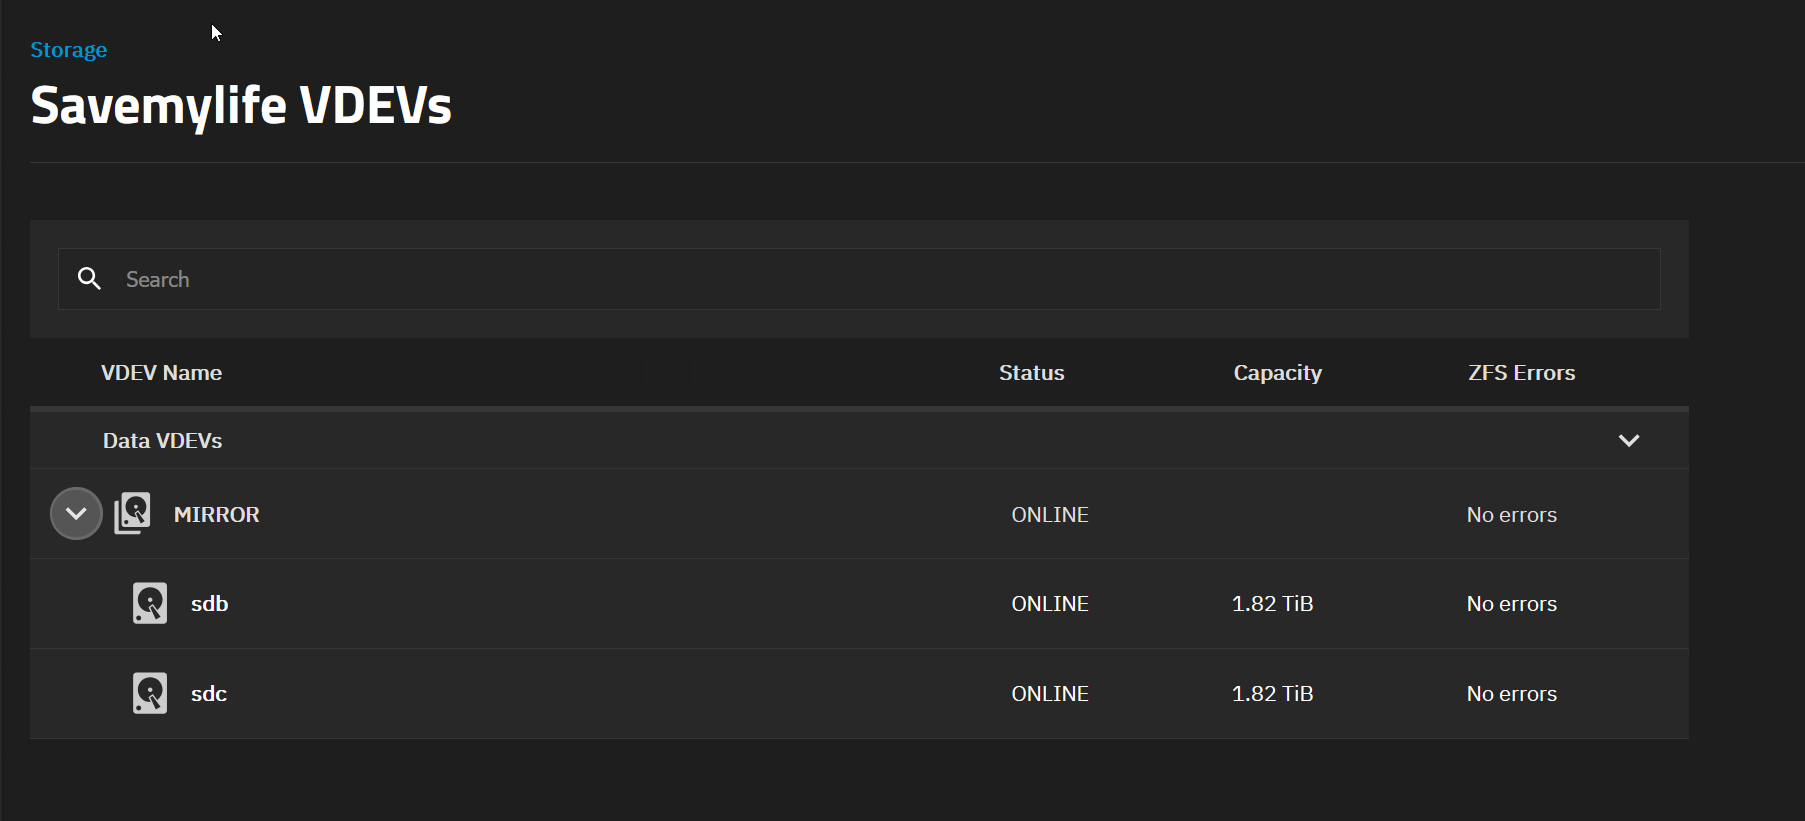
Figure 3. TrueNAS web interface showing the configured storage pool.
I also enabled SMB sharing so my Windows devices could easily access the server over my home network. After testing file transfers between multiple devices, everything worked exactly as expected.
Recap
This project gave me hands-on experience with TrueNAS, ZFS and SMB sharing, and turned into a storage server I still rely on today.